67. Pi-Robot
In this project, we will be using Raspberry Pi once more for creating the robot. Last time, we used the Raspberry Pi for a laptop, Retropie, and the Google AIY Voice system, and so we will utilize the Pi and control it. To make it work, we will use the Bluetooth functionality on the Raspberry Pi, and the android phone.
The reason why we use the Bluetooth function in the PI is that it's accessible, responds a little more quickly than wifi, and doesn't need the entire wifi system, which in other words, to connect the raspberry pi to the computer, you will need a reliable internet connection to make it work, but with Bluetooth, just set up which one is central and peripheral, and done.
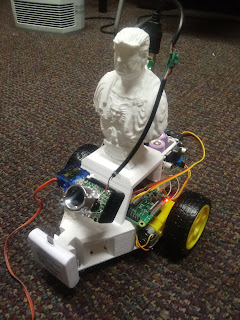
This project will also utilize the same chassis as the line-follower, Obstacle avoiding, and Object seeking robot, but the main difference for all 3 robots is that instead of using an Arduino board, the robot uses the raspberry pi model 3 b.
 |
| <Zero> |
We will also need to use the same dc motors as from the other 3 robots, the L293 motor driver, some wires, a USB camera(optional), a TP4056 charger, power boost converters, and an sd card with Raspian in it. The motor driver will be driving the motors, and it will also require an external power source. Assemble the chassis and motors as so, and wire up the power connections, which start with connecting the battery cells to the tp4056, then solder the wires of the battery to the 2 power boost converters,. Finally, on the output end of the power boosts, connect one for the PI, and the other for the motor driver.
Once everything powers up as expected, insert the flashed SD card into the raspberry pi, and then connect the pi to the screen so you can see the PI desktop. At this point, you will need to access the desktop remotely, and so you will need something like a VNC viewer to see the desktop with the IP address.
 |
| <Chassis> |
To control the robot, we need to download the app called Blue Dot, which is a GUI app for controlling the raspberry pi with a touch of the blue dot via Bluetooth. Once you downloaded it, make sure that the raspberry pi and the phone are paired up. This is done by going to the settings of the phone and going to the Bluetooth section so that the phone is automatically configured to be "discoverable".
On the Raspberry side, download modules used for controlling Blue dot, and make sure that the Bluetooth was enabled and is searching for the phone. You should see your phone in the pi list, so if you found your device, click "pair", and verify on the phone side so that the Pi can connect it. Ignore the warnings about the no services, the blue dot program hasn't started yet.
 |
| <Almost there> |
If you do the steps correctly, you should be able to make a program that utilizes the Bluedot module, and so once the pi and the phone are connected to each other, the phone will bring up the blue dot, and you can start controlling it.
Of course, this functionality is not limited to just making Bluetooth robots, you can change the color of the dot, dim the lights, control the motors, and many more-just looks up the Blue dot documentation and see how they work!


Comments