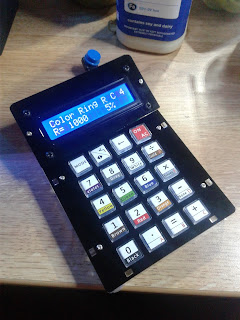
57/KIT: Calculator
This calculator kit will provide a hands-on experience in soldering, and once assembled, it becomes a useful tool for more than just simple calculations.
 |
| <Calculator> |
The kit not only provides the electronic components for the calculator, but it also comes with acrylic pieces so that you can assemble the enclosure for your calculator internals.
It's powered by 2 coin cell batteries, which is sufficient for powering the entire unit, and even though it has no on/off switch, it can power off automatically after 20 seconds, saving battery life.
To start off with the kit, you will need to do 2 parts, assembling the circuit board, and creating the case for the circuitry.
 |
| <Parts> |
For assembling the circuit, you will need to put the right components in each place according to the instructions. You will need to solder the pins to the LCD board, and then solder the LCD to the mainboard. Once you got the components, IC, and the LCD soldered in place, then solder in a whole bunch of pushbuttons, which can get tedious, but it's easy to do.
Once the circuit was assembled, insert the batteries, and then turn it on, and press the button.
 |
| <Completed board> |
If you got it to work, then you can move on to assembling the case. It's simple to do, just try to fix the pieces together through the hole and slots, and then screw them together. Make sure that the circuit fits in the enclosure without any distortions.
You are now ready to add the buttons, wherein the kit is provided with a template of all the labels. You will have to cut each label so the labels stay separate, add it to the button cover, and reseat it to the right push button.
Now you got a working calculator that you can use for your everyday task!


Comments